Getting started
Please see the installation documentation if you haven't finished installing the central server component yet.
Add a warehouse location
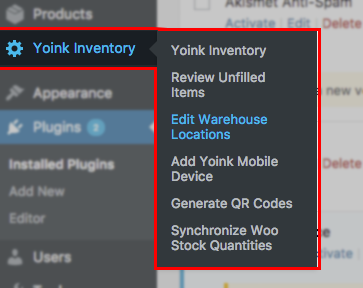
Before you can start entering product locations via Yoink Mobile, you'll need to create at least one warehouse location. Choose 'Edit Warehouse Locations' from the Yoink Inventory sub-menu in a WordPress admin screen.

To create a warehouse entry, first choose the country where the warehouse is located, then click 'Next'.
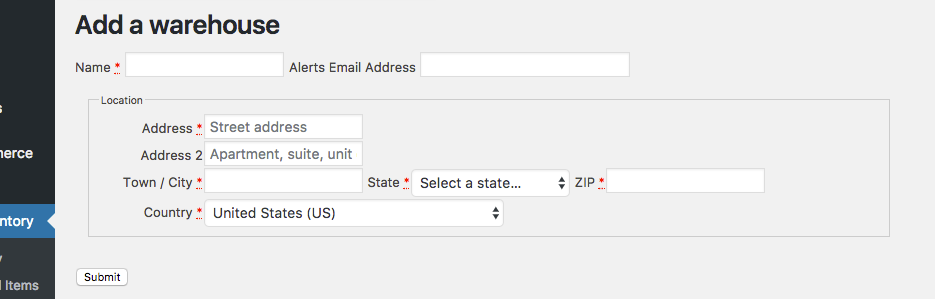
Fill out the required fields in the details form. Enter a descriptive short-name for the warehouse in the 'Name' field that will help you differentiate it from other warehouses in the future E.g., if the warehouse is on the west side of Geopolis, you could enter 'West Geopolis'.
You can also add an email address for the warehouse manager(s) that'll receive alerts if/when warehouse personnel find unexpected product counts at particular locations. Please make sure that your copy of Woo Commerce has it's SMTP settings configured correctly and has been successfully sending e-mails before counting on this feature.
Hit 'Submit' when you're done.

If you ever need to edit the warehouse details, you can do so by clicking the warehouse name of the new entry on the 'Edit Warehouse Locations' page.
Print up some QR stash/location codes
You can generate and print stash codes using the 'Generate QR Codes' form from the WordPress admin sub-menu. You can find detailed instructions below the form or here.
Create users and/or assign permissions
You'll need to have at least one WordPress user account and preferably one for each staff member that will be handling inventory or managing a warehouse. Each staff account will need to have one of the roles or capability sets added by Yoink Inventory. The WordPress public documentation has more information about managing user accounts as well.
Point your mobile devices to the central server
When you first load Yoink Mobile (available via the Google Play and Apple App Stores--just search for 'yoink'), it'll prompt you for the internet address of your central-server/Woo-Commerce-store. If you load the admin section of your site and click 'Yoink Inventory' menu item then 'Add Yoink Mobile Device' sub-menu item, you'll get a QR code you can scan to link the device. Once connected, you'll also need to generate a Woo Commerce consumer key and consumer secret to authenticate the mobile user. Just follow the instructions and the link on the same admin screen to generate a second QR code which can be scanned from Yoink Mobile's second setup step.
Input and synchronize existing quantities
You can use the 'Receive Inventory' function in Yoink Mobile to start entering product location-quantities. Once you've gotten all of the location-quantities entered for one or more products, you can enable quantity syncronization with Woo Commerce. That will keep those quantities and back-order statuses (as they're displayed to customers in the public side of the store) up to date in real time.
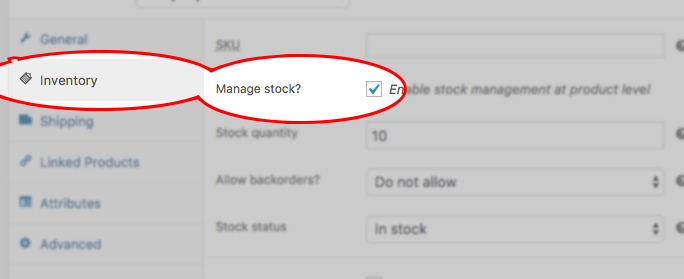
First make sure Woo Commerce is tracking quantities for each product or product-variation you'd like to be tracked. Open the product details in the admin screen and ensure the 'Manage stock?' box (under the Inventory tab) is checked and then save the product information. More details are available in the Woo Commerce public documentation.

Next, choose 'Synchronize Woo Stock Quantities' from the Yoink Inventory sub-menu in the WordPress admin screen, then click the 'Enable synchronization'. This will overwrite the counts managed by Woo Commerce.
Since a given product may exist in more than one location, the quantity synchronization feature is forward-only:
- All Yoink Inventory stash location quantities for each product are added up
- For each product quantity sum, any reserved quantities for outstanding orders are subtracted
...and finally the Woo-Commerce-managed product quantities are overwritten with the result of the preceding calculation.
As mentioned, once synchronization is enabled, the quantities will be kept in synch in real time as they're updated via Yoink Mobile. If things get out of synch for any reason, you can come back to this screen and there will be a 'Re-Initialize' button you can click to overwrite the Woo Commerce values using the calculation described just above.
Ensure the Yoink Inventory data is included in your backup regimen
Yoink Inventory adds a number of tables to the database backing your WordPress installation. All of the table names* are prefixed with e.g., 'wp_yoinkinventory_' (the 'wp_' prefix is a default but configurable part of your WordPress installation). There are more details about how to backup your WordPress data, including plugin data, available in the WordPress public documentation.
* E.g.,
- wp_yoinkinventory_warehouses
- wp_yoinkinventory_stashes
- wp_yoinkinventory_warehouse_log
- wp_yoinkinventory_order_state
- wp_yoinkinventory_order_item_state
- wp_yoinkinventory_unfilled_items
You can also make use of the Comma-Separated Values (CSV) export feature to capture a snap-shot of the Yoink Inventory data. Be warned, though, there's not presently any functionality in Yoink Inventory to re-import CSV data in bulk. It'll just give you a document that you can use for e.g., audits or to help manually re-enter quantities. Using full table backups as in the WordPress documentation is the recommended way of ensuring continuity in the face of disaster.
To export the CSV data, click the top-level 'Yoink Inventory' menu item in the WordPress admin screen and then click the 'Export Stash Data As CSV' button. Your browser will download the snap-shot to your local system. You can open the file in a text editor or using a spread-sheet app such as LibreOffice, Microsoft Excel or Google Docs.